Can you copy SSH keys to new PC? (Windows or Linux)

You dont need to generate new SSH keys when switching or upgrading to new PC.

Copying SSH Keys to a New PC: Windows and Linux

On Linux:

  1. Locate Your SSH Keys: Your keys are usually in the ~/.ssh/ directory.
    ls -al ~/.ssh
  2. Copy the Keys: Use a USB drive or a secure transfer method. If using scp:
    scp -r ~/.ssh username@newPC_IP:~/
  3. Set Permissions: On the new PC, set the correct permissions:
    chmod 700 ~/.ssh
    chmod 600 ~/.ssh/id_rsa
    chmod 644 ~/.ssh/id_rsa.pub
  4. Test the Connection:
    ssh -T git@github.com

On Windows:

  1. Locate Your SSH Keys: If using Git Bash, your keys are typically in C:\Users\YourUsername\.ssh\.
  2. Copy the Keys: You can copy the .ssh folder to a USB drive or use file transfer methods.
  3. Paste to the New PC: On the new PC, paste the .ssh folder into C:\Users\YourUsername\.
  4. Permissions: You do not need to set permissions on Windows. Just ensure your private key (id_rsa) remains secure.
  5. Test the Connection:
    ssh -T git@github.com

Notes:

  • Ensure Security: Keep your private key secure and do not share it.
  • SSH Agent: If you use an SSH agent, you may need to add your key again on the new PC with ssh-add.
  • Update Public Key: If necessary, copy the contents of id_rsa.pub and update it in your Git service account settings.
Create and use SSH key to login to your server

OK, this is one of those posts where I am mostly writing down what I did to remember it for next time and not one of those generic advices with all kinds of options. Hope it still helps you.

Generating SSH keys

Let say you want to connect to your hosting server with your computer (Windows) using SSH keys and not use password anymore. Passwords are annoying and less secure.

Open the Windows Terminal and type ssh-keygen

You will be prompted to specify the location and filename for the key pair. By default, it will be saved in the user’s home directory under `C:\Users\\.ssh\`. I just pressed enter.

Next, you’ll be prompted to enter and repeat a passphrase for the key. If you want you can create one but I just pressed enter twice to skip it. SSH key pair will now be generated: a private key (`id_rsa`) and a public key (`id_rsa.pub`).

You can now use the public key (`id_rsa.pub`) for authentication purposes with remote servers or services. The private key (`id_rsa`) should be kept secure and not shared with anyone.

Adding public SSH key to your hosting account via Cpanel

Login to you hosting account’s Cpanel and click on ‘SSH Access” then “Manage SSH Keys” and then “Import Key”.

Now you can go back to Windows and open that id_rsa.pub file and copy the content of it or you can type this in terminal (assuming the name of your public SSH key id_rsa.pub):
clip < C:\Users\\.ssh\id_rsa.pub

keep in mind you have to use path and name of file on your computer, not just copy paste the above.

Then go back to cpanel’s “Import SSH Key” page and give it a name (like My PC), input your passphrase (if you have one) into passphrase field and then paste the public key into field for public key. I left private key field empty. Click Save or Import.

You will be taken to Public Keys page. If your key is NOT authorized then click Manage next to your key and click Authorize and save.

Connect to server via terminal

In your server’s Cpanel you should find username, IP and maybe port. Then you type:’

ssh username@SERVER-IP:port

hit enter and you should connect to server without the need for password.

Midnight Commander Garbled

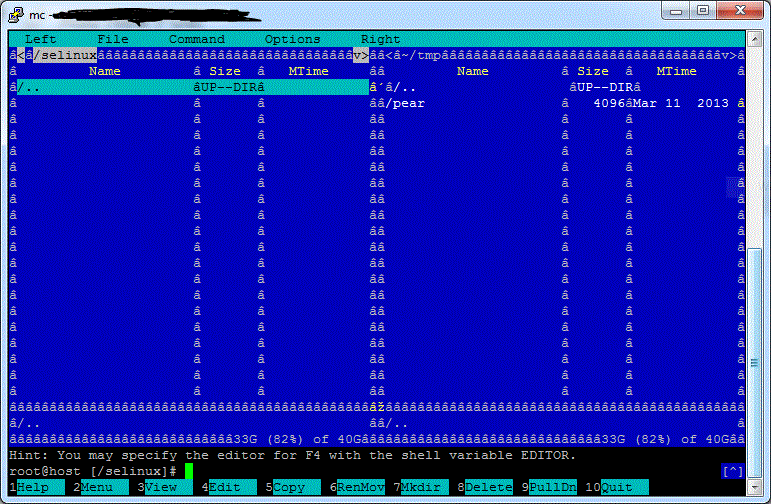
If you log in to your Linux server via Putty SSH and start Midnight Commander (MC) you might get garbled lines like this:

midnight commander garbled

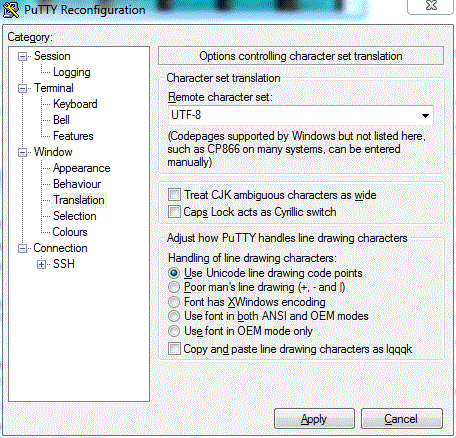
The problem is not with Linux or MC but with Putty using “incorrect” character set. So what you need to do is click on the top-left corner of Putty window (just left of word “mc” and that horrible black smudge I made to hide my server name)  and when menu appear select Change Settings and then navigate to Window -> Translation and change Remote character set to UTF-8 :

putty config

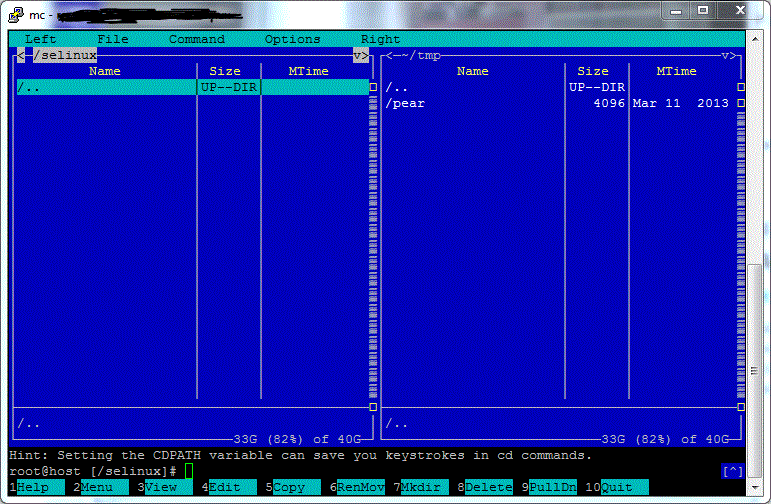
Click Apply, restart Midnight Commander and it will now look much better with proper border lines:

midnight commander

That’s it. If you still have problems then open Putty Reconfiguration window again, navigate to Window->Appearance and try changing the font used in terminal window. I use Courier New.